Login
Login as administrator to your WebMO Cloud instance using the URL and credentials in your "WebMO Cloud subscription activated" email. The URL will be something like
- https://<university>.cloud.webmo.net
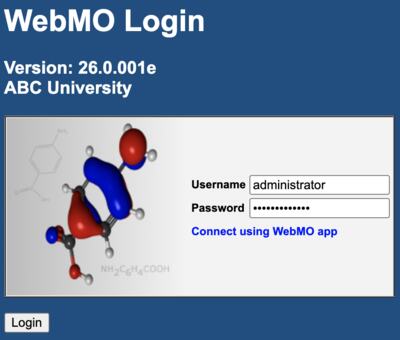
WebMO Cloud Login Page
Enter "administrator" as the username and your password on the WebMO Login page, and click the Login button. You will be brought to the administrator Welcome page.
WebMO Cloud Administrator Welcome Page
After logging in, you will be viewing the WebMO Cloud administrator pages. Various administrator functions are listed on the Nav Panel on the left.
The Welcome page describes various tasks for the administrator to complete for customizing the instance and verifying its function.
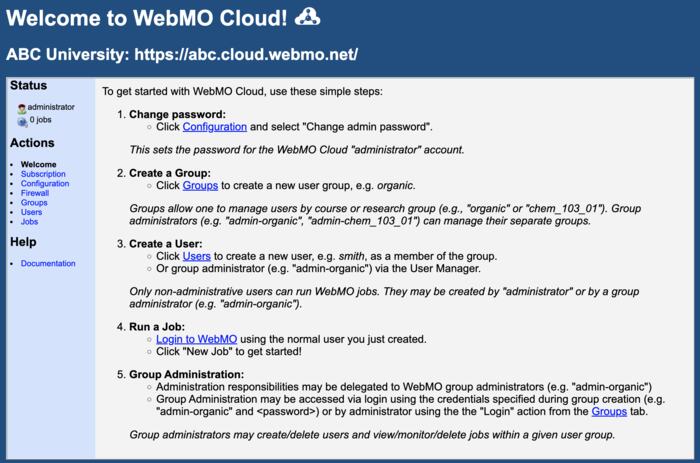
WebMO Cloud Administrator Welcome Page
1. Change Password
Change the administrator password to something easier to remember. Click Configuration in the Nav Pavel. Select "Change admin password" and provide the new password. Return to the Welcome page.
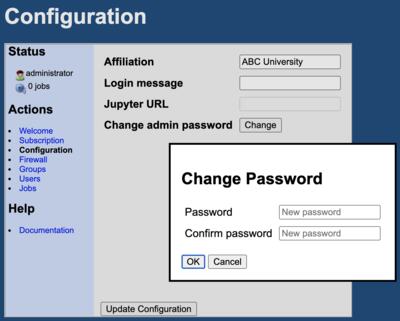
Change Administrator Password
2. Create a Group
WebMO Cloud is build around the group concept. A group consists of multiple WebMO users and one group admin (which is distinct from the administrator for the entire WebMO Cloud instance). Group members are typically students in a course or members of a research group. The group admin is typically the course instructor or research supervisor. The administrator is responsible for defining these groups within a WebMO Cloud instance.
Every regular WebMO Cloud user is a member of one group. Only regular users can run jobs. In particular, the administrator and group admins cannot run jobs; to do so, they would need to create separate regular user accounts.
Thus to run a WebMO job, the administrator must first create a group. Click Groups in the Nav Panel. Provide the name of the group and the password for the group, and click OK. The new group will appear on the Groups page. Return to the Welcome page.
This process also creates the group admin, which has the WebMO Cloud username of "admin-<group>".
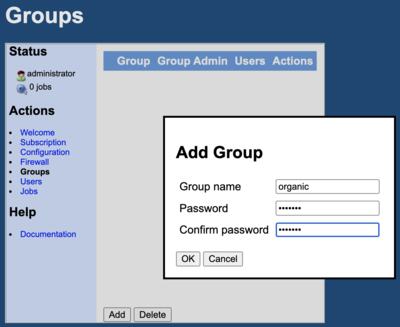
Create a Group
3. Create A User
Only regular, non-administrative users can run WebMO jobs. Thus to test a WebMO Cloud instance, one must create a user. The administrator can create users with the Users function.
Click Users in the Nav Panel, and click the Add button. Provide the requested information (username, optional fullname, group, and password), and click OK. The new user will appear on the Users page. Return to the Welcome page.
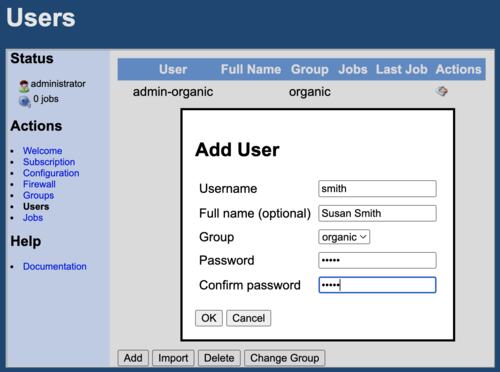
Add a User
The group admin (username is "admin-<group>") can also add users with their User Manager. This is the usual way that a course instructor or research supervisor will add WebMO users to their groups.
4. Run a Job
Now that a new user has been created in a group, it is possible to run a WebMO job!
In a separate tab, go to the login page
https://<university>.cloud.webmo.net
and login as the new user. You will be at the user's Job Manager page.
Build a simple molecule (H2O), submit a job (Opt + Freq), wait for the job to complete, and view the results. Tutorials and videos describe this process.
5. Group Administration
After setting up the group structure of your WebMO Cloud instance, the administrator can optionally delegate the creation of users and monitoring of jobs to group admins.
Group admins login to WebMO using the username "admin-<group>" and the group password. Group admins can then use their User Manager to create new users and Job Manager to monitor jobs. These group admin Managers are even more versatile than the administrator functions. For example, group admins can import lists of new users from a spreadsheet. They can also view all past jobs run by members of their group.
It is also possible for the administrator to login as a group admin from the Groups tab using the Login icon ( ). Thus the administrator has access to every group admin's pages without having to provide their username and password.