Overview
The WebMO Cloud "administrator" is a simplified version of the "admin" user in WebMO Basic / Pro / Enterprise. The administrator is responsible for maintaining the subscription, setting overall properties, defining the group structure, and monitoring the function of the instance.
In particular, the administrator can
- View the status of the WebMO Cloud subscription
- Customize the WebMO Cloud login page
- Define a firewall for accessing WebMO Cloud
- Add, edit, and delete groups
- Add, edit, move, and delete users
- Monitor and delete running and queued jobs
In addition, the administrator can login as any group admin to
- View, download, and delete past jobs
- Define job templates for running customized calculations
Welcome
The Welcome page is displayed when first logging in to setup WebMO Cloud and run a test calculation. It can be re-visited in subsequent logins to complete or refine the setup operations. A full description of the Welcome page is available at Cloud Setup.
Subscription
The Subscription page displays the status of the WebMO Cloud subscription. The subscription Tier (0, 1, 2, 3) and its capabilities are listed. In addition, this page is particularly useful for monitoring
- Disk usage - when the disk is full, additional jobs cannot be submitted
- Paid through - the subscription will be automatically renewed on this date, unless the customer has canceled the subscription beforehand
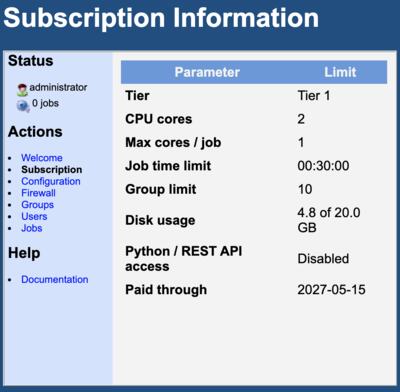
Administrator Subscription Page
Configuration
The Configuration page allows for customization of WebMO Cloud, such as the affiliation displayed on the Login page and the email address of the administrator.
Login message is useful for communicating system-wide messages, such as "System down 8-10am Saturday, April 1 for maintenance".
The Jupyter URL is active when Python/REST API access is enabled, and it defines the default location of a Jupyter server (typically either mybinder.org or a local server).
Enforce password complexity requires that group admin and user passwords have at least 1 uppercase and 1 lowercase letter, at least 1 number, and 8+ characters. This is always required for the administrator account.
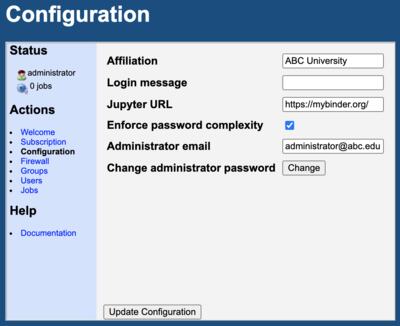
Administrator Configuration Page
Firewall
The Firewall allows the WebMO Cloud to be accessed from only specified IP address ranges, typically those associated with your organization.
CIDR notation is used. For example,
192.168.1.37 specifies one IP address
192.168.1.0/24 means that the first 24 bits (3 bytes) of the IP address are valid, i.e., the range 192.168.1.0, ..., 192.168.1.255
An anti-lockout mechanism prevents administrator from specifying IP addresses that do not include their own IP address. However, if the IP addresses of WebMO Cloud users subsequently changes, perhaps due to DHCP or network re-configuration, it is possible for the administrator to become locked out. In this case, contact webmo.net to have us disable the firewall for you.
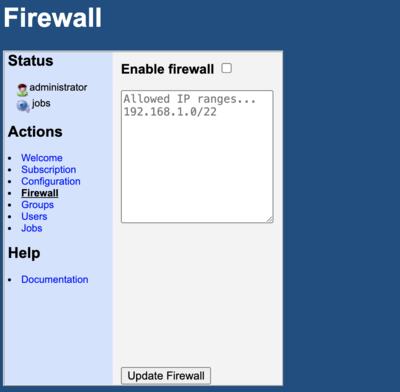
Administrator Firewall Page
Groups
Defining groups is central to the administrator's responsibilities. Groups are collections of users, eg, students in a course or members of a research group. Every group has a group admin, who is typically responsible for adding new users to the group and monitoring jobs within the group.
The purposes of groups are:
- to separate the organization and maintenance of WebMO as a whole from the usage of WebMO by its users
- to "offload" administrative work to the course instructors and research group supervisors who regularly interact with their WebMO users
- to separate users and jobs into subsets that do not need to know about or have access to each other's work
In order for a user to run WebMO Cloud jobs, at least one group must be created by the administrator. The procedure for creating a group is documented in the Cloud Setup page. Briefly, Click the Add button, specify the group name and password, and click OK. Later provide the group username (admin-<groupo>) and password to the group admin, along with instructions on how to add or import users.
Groups can be deleted when the members and jobs are no longer needed, eg, at the end of a semester. It is important to notify users that their accounts and jobs will be deleted, so that they can download any important information to their local computer beforehand!
The administrator can control the permissions on groups with the Edit icon ( ). For example, it might be desirable to allow research groups to have access to ab initio programs (gamess, nwchem, psi4, ...) and longer job limits, whereas introductory course students might be limited to semi-empirical programs (mopac, xTB, ...) and shorter job times.
The administrator can also disable job execution for a group, which will allow group users to access their previous jobs but not submit any new ones.
Group admins have a more granular picture of Users and Jobs than the administrator. If the administrator needs addition detail or wishes to take on group admin responsibilities, they can login at a group admin using the Login icon ( ).
).
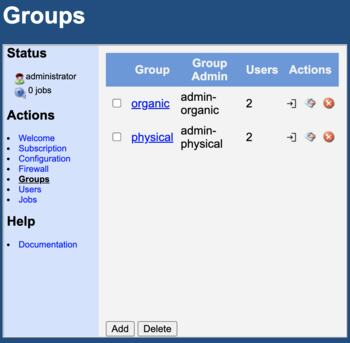 Administrator Groups Page |
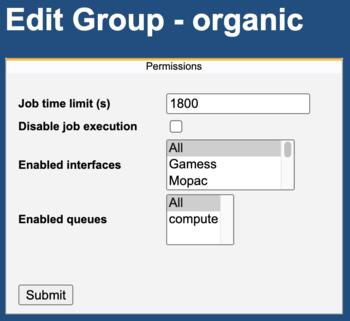 Edit Group |
Users
Users may be created by the administrator or the group admin. To add a single user, click Add, supply the requested details, and click OK. Multiple users can be added by importing list of users in a CSV spreadsheet; see User Lists for detailed instructions. Users and their jobs can also be deleted by selecting one or more users and clicking Delete.
The administrator can move users to a different group by selecting users, clicking Change Group, and specifying the group to which they should be moved.
User properties may be edited by clicking the Edit icon (). See Edit User Profile for details on changing the Password and Preferences (E-mail address, Job notifications, and Archive format). The Permissions tab specifies the job time limit and engines of a user. By default these are same as the group settings. However, it is possible to increase (within group limits) or decrease job time limits and allow different engines for specific users.
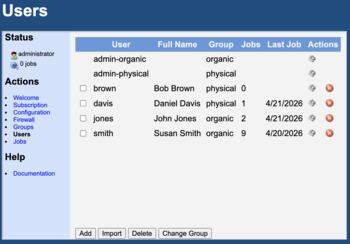 Administrator Users Page |
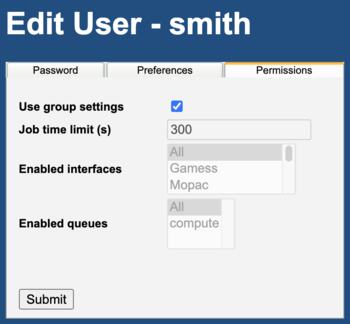 Edit User Permissions Tab |
Jobs
The administrator is able to view the submission of all jobs from all groups to their instance of WebMO Cloud. This allows monitoring of how the instance as a whole is serving all users of the group.
The WebMO Cloud queue services jobs on a first-come first-served basis, which is the simplest and most reliable queuing model. The Jobs page shows the status of all active (running and queued) jobs. If any running or jobs are preventing other more important or timely jobs from running, the administrator can kill the offending jobs to allow the timely jobs to run.
For example, if a research group queued several multiple hour-long jobs to run before a general chemistry class queued many 10 second jobs, the administrator might want to kill the long jobs to allow the short jobs to run. Note that if this situation occurs regularly, it usually suggests that more nodes or a separate subscription is necessary.
If the administrator wishes to view inactive (completed) jobs, it is necessary to use the Groups page to login as the group admin and visit its Jobs page.
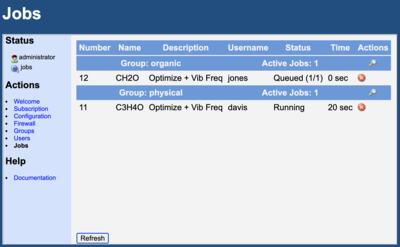
Administrator Jobs Page
Subscription Cancellation
WebMO Cloud subscriptions are started, maintained, and canceled through PayPal. To cancel your subscription, login to your PayPal account, navigate to Profile (or Settings) > Payments > Automatic Payments. Under Active, and choose WebMO, LLC. Click "Stop paying with PayPal" to cancel your WebMO Cloud subscription. Confirm by clicking "Stop paying with PayPal" two more times. You will be sent an email from PayPal confirming that you have ended your subscription to WebMO Cloud.
You may cancel your subscription at any time, and your WebMO instance will remain paid for and fully functional until the end of the current payment period.
Data is not retained after a WebMO subscription ends. Jobs of value must be downloaded or exported by group admins or users to a local machine for long-term storage and future access.
If you have any questions, concerns, or difficulties regarding cancelation of your WebMO Cloud subscription, please contact us at support@webmo.net.