Installing WebMO on Q-Chem Cloud Instance
Q-Chem offers a cloud image of the Q-Chem program which runs on Amazon Web Services (AWS). After Q-Chem has been installed and activated, WebMO can also be installed on the same virtual machine using the Server In The Cloud (SITC) script.
To run Q-Chem in the cloud, you will need a Q-Chem license. Visit the Q-Chem site to obtain one. You will also require an account on AWS. If you do not have an AWS account, detailed instructions for setting one up can be found in the WebMO SITC instructions.
The following summarizes the entire process of creating a cloud virtual machine with Q-Chem and then installing WebMO on it.
Create an Instance of the Q-Chem Image
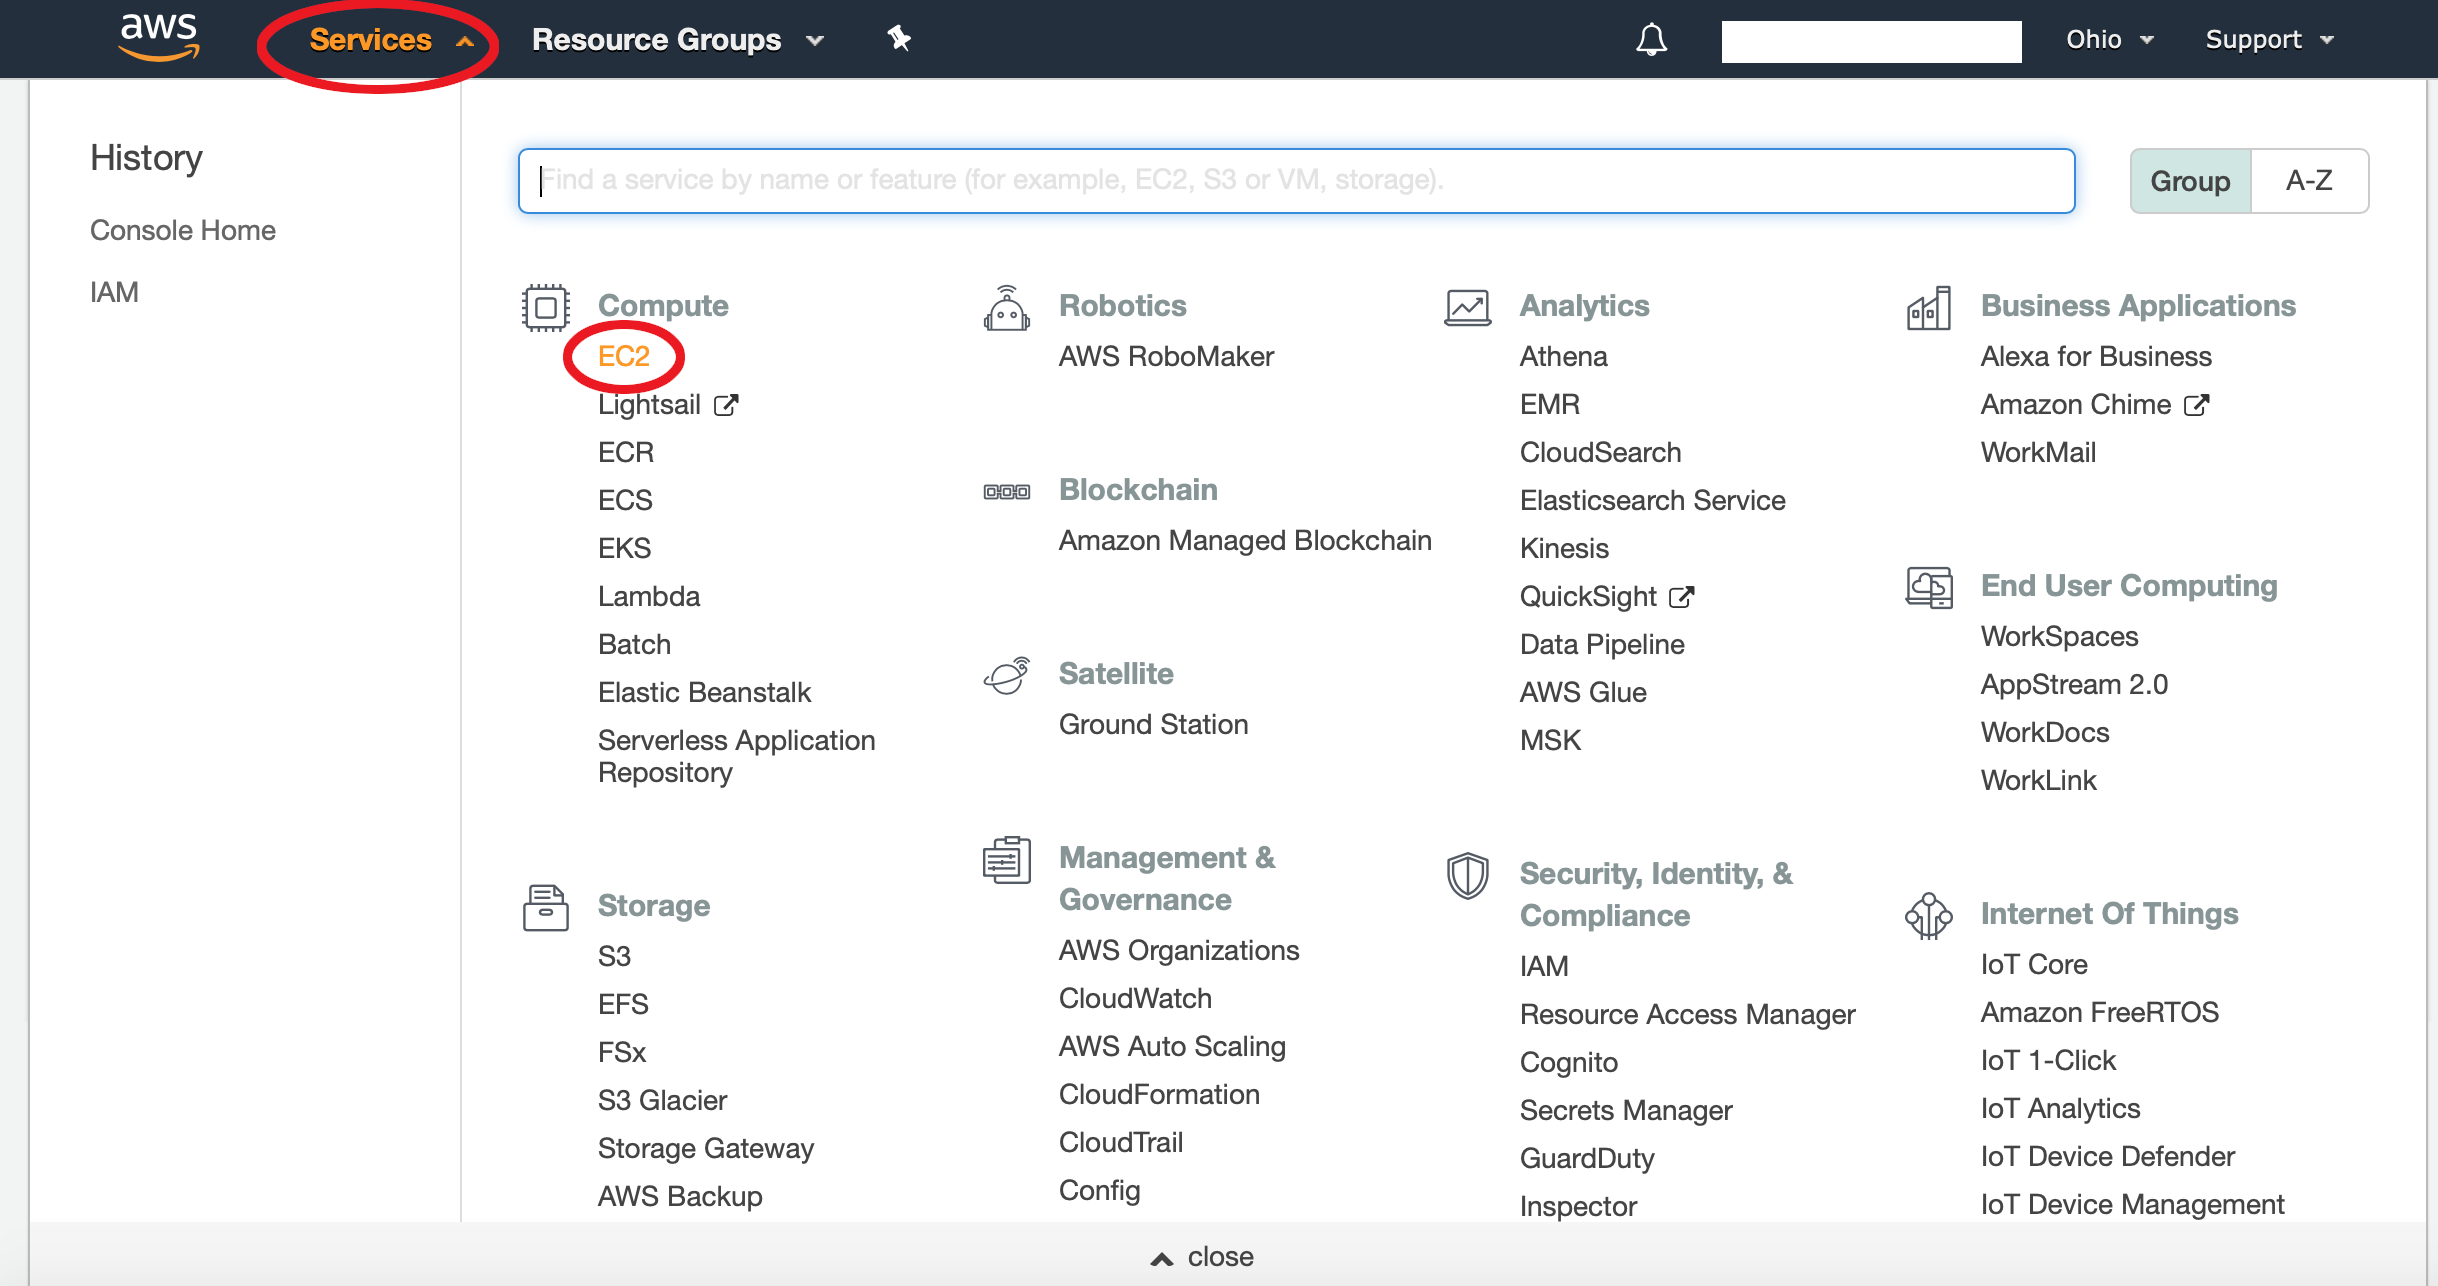
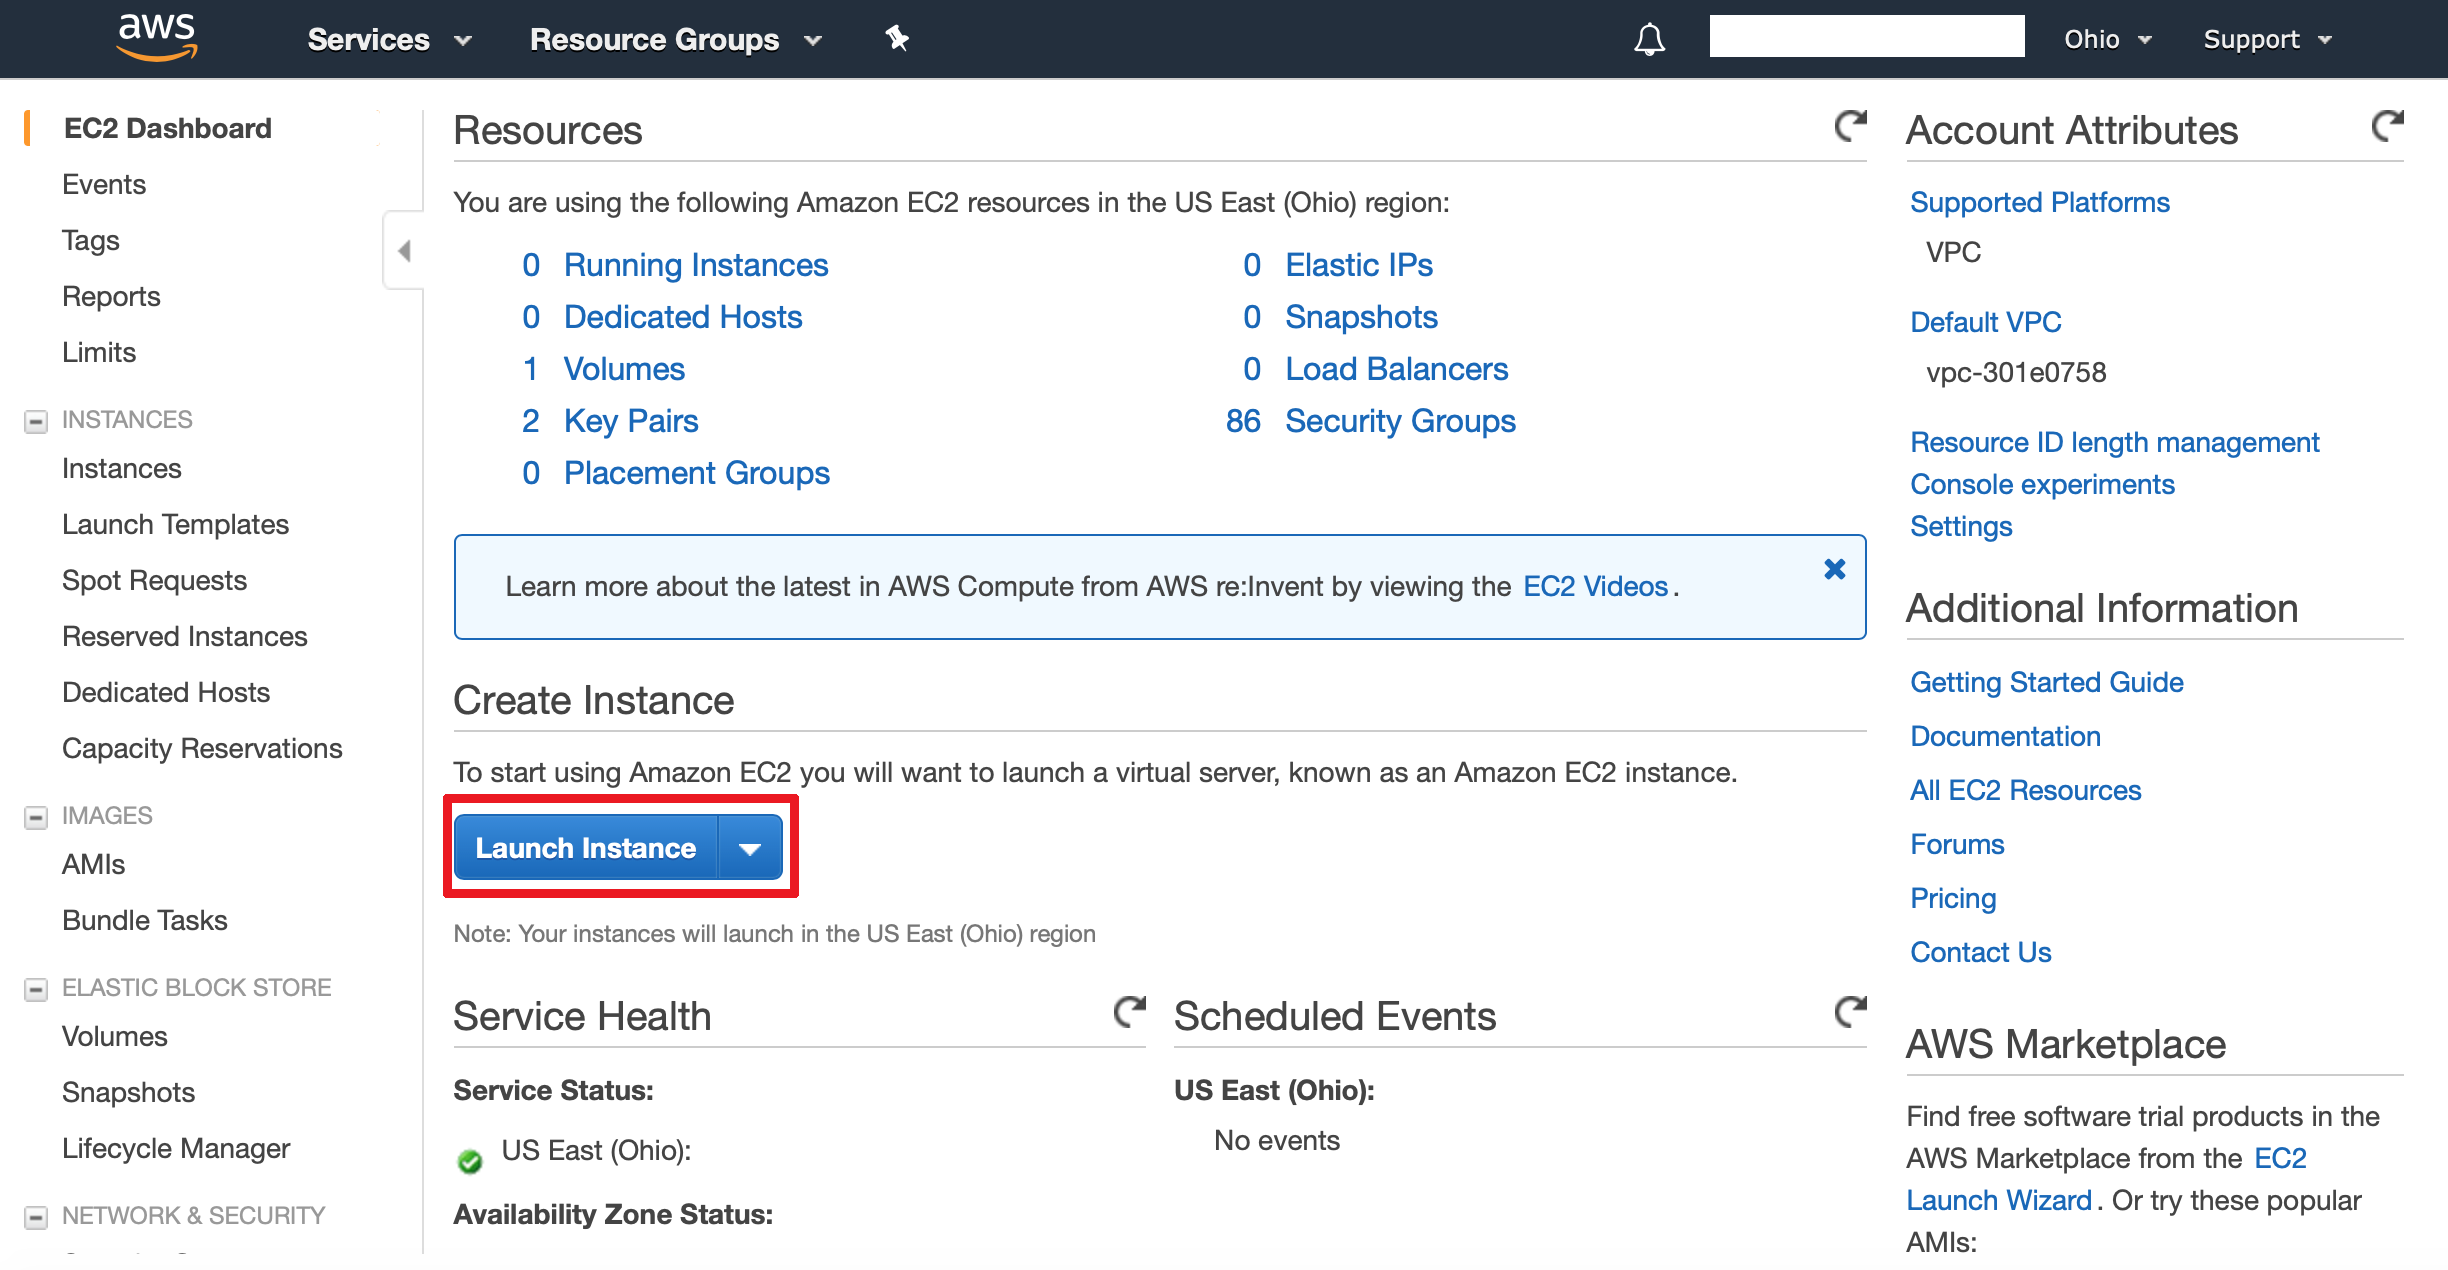
In the AWS console under the "services" dropdown, select "EC2". Then, select "launch instance".
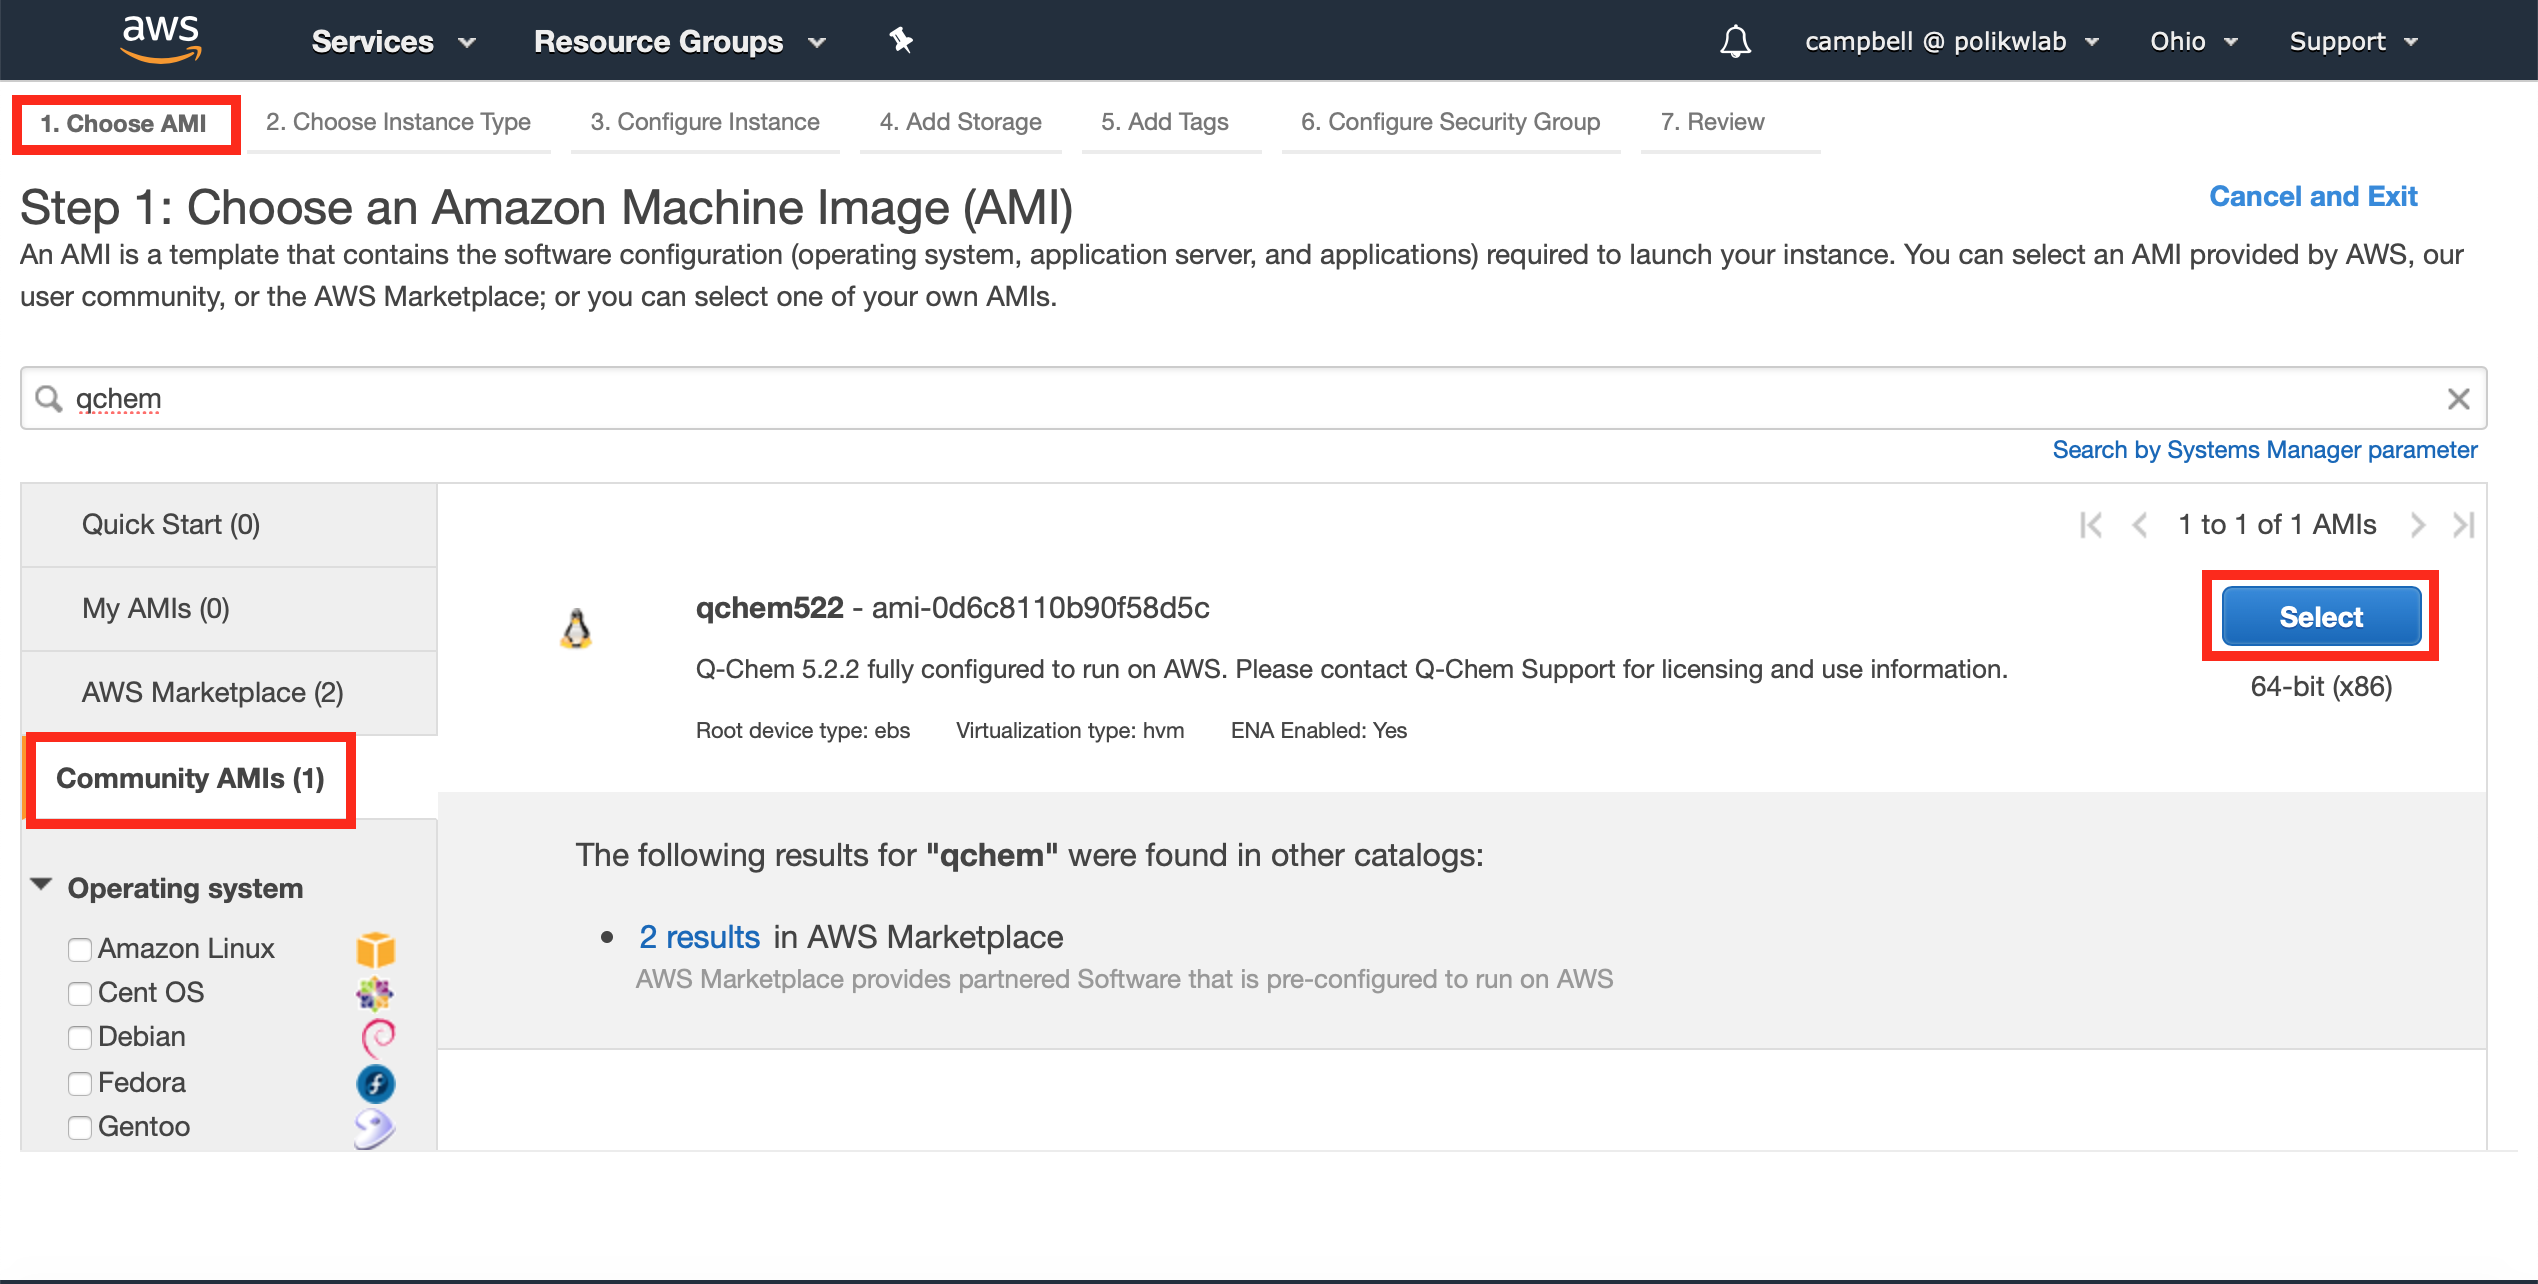
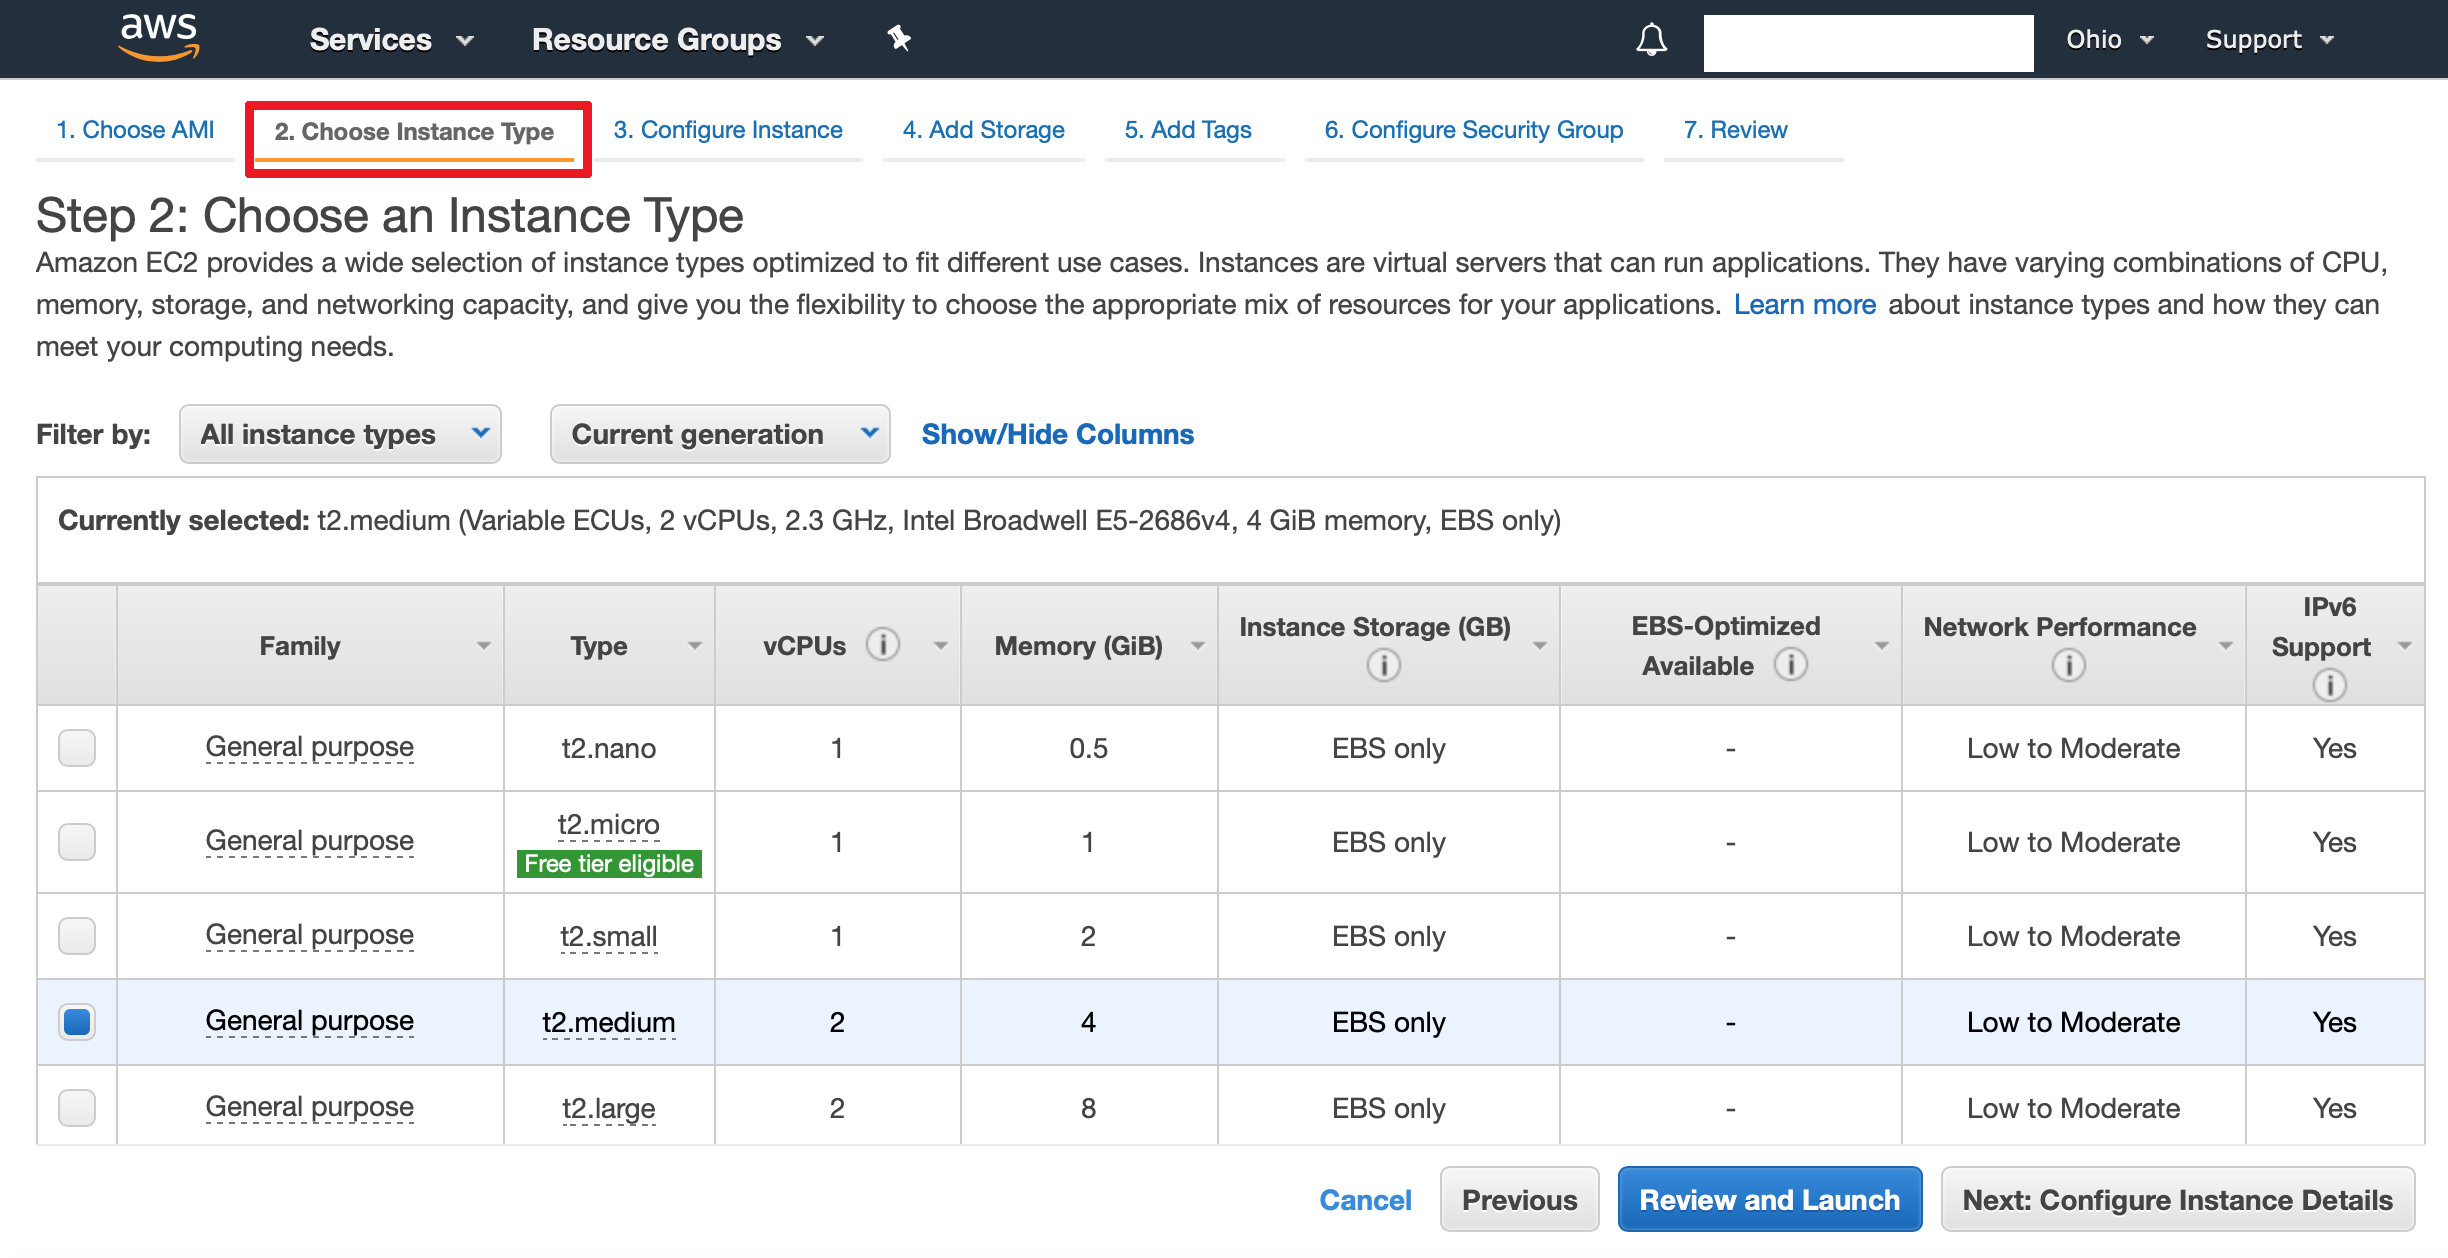
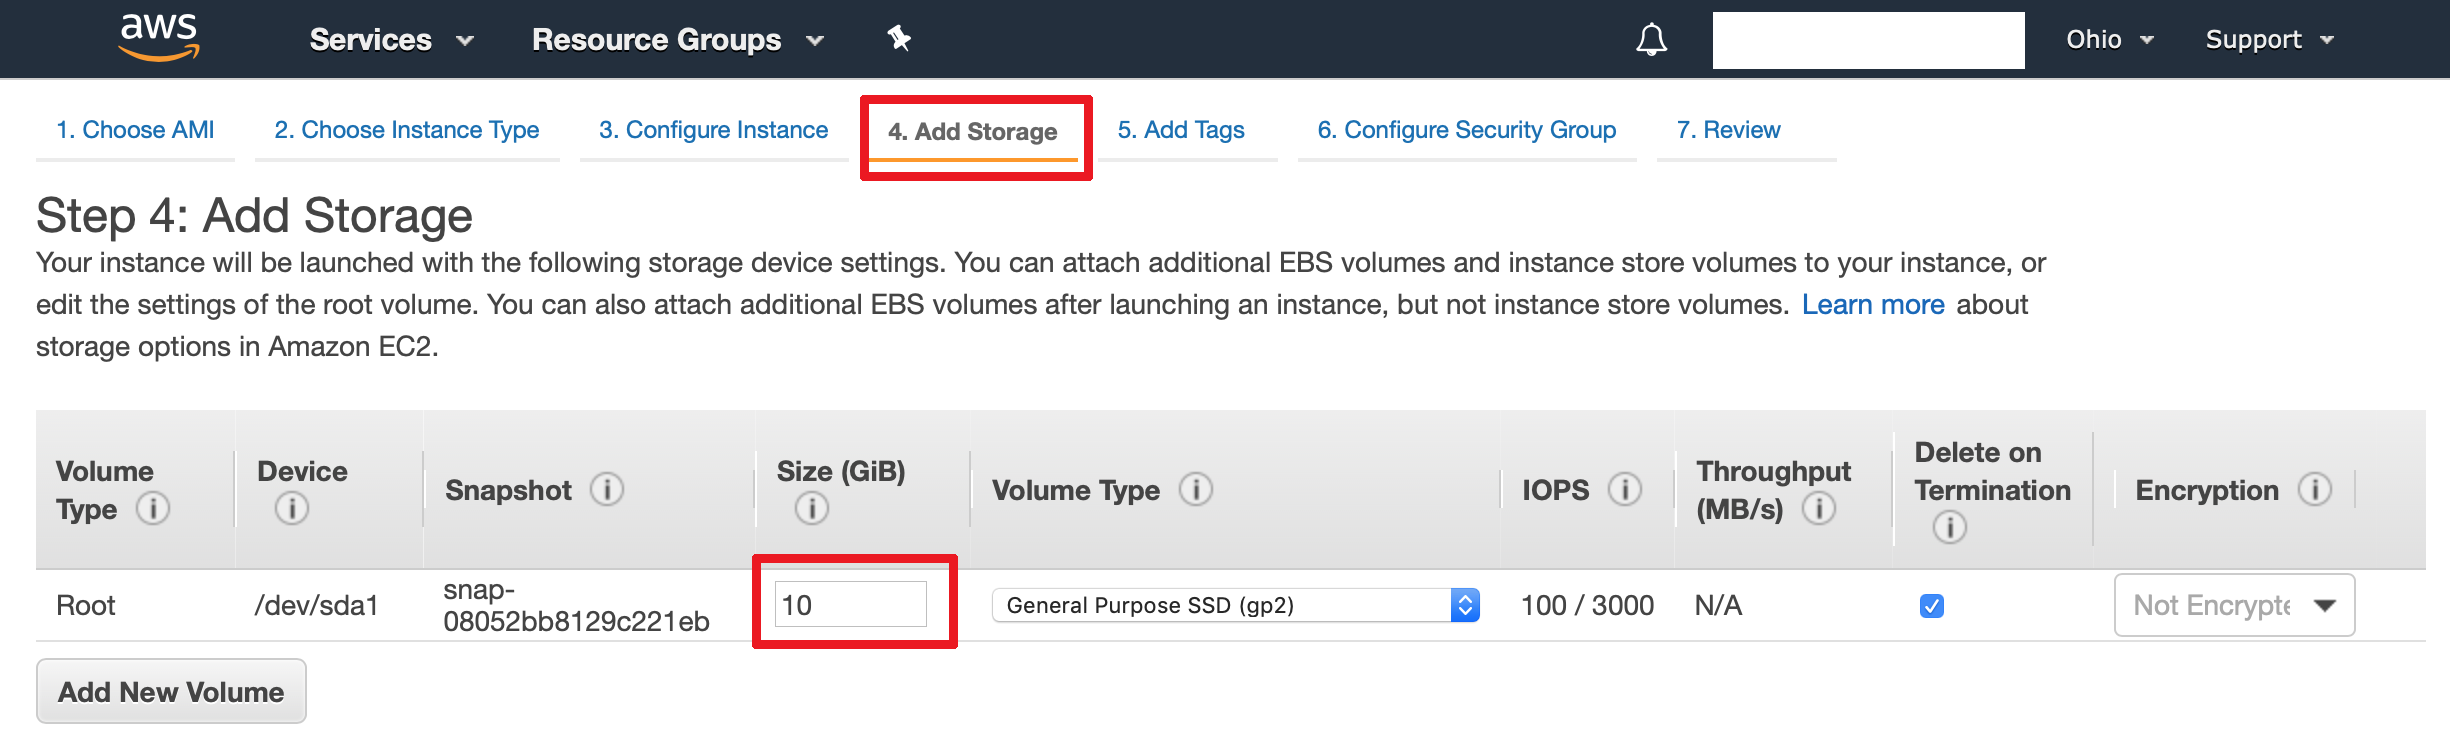
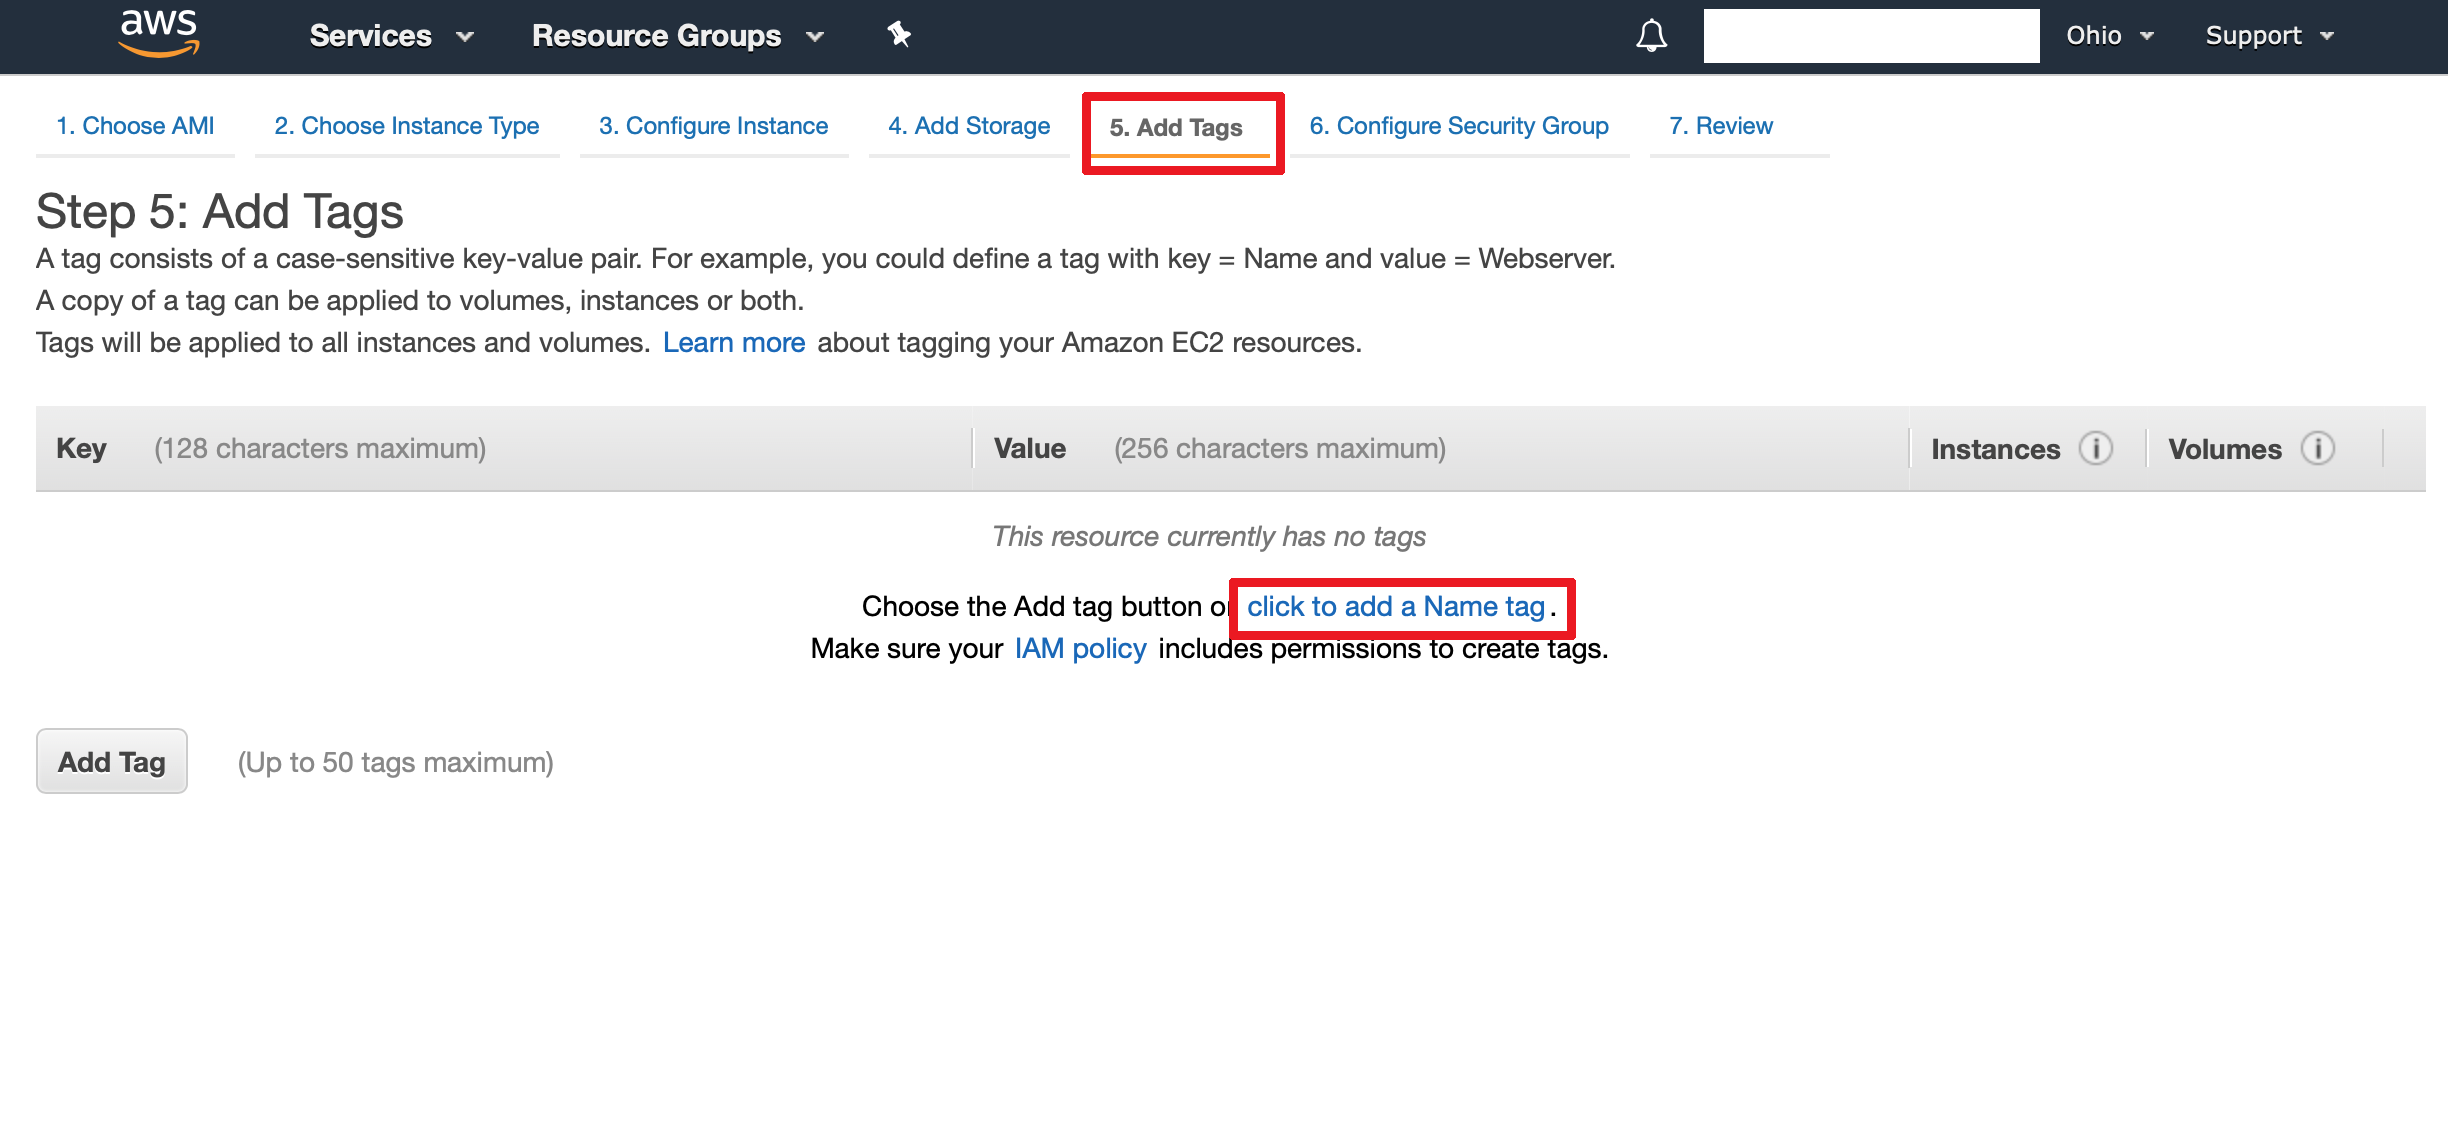
Under Choose an Amazon Machine Image (AMI): Navigate to the Community AMIs tab. Then search for qchem and select the qchem AMI. Under Choose an Instance Type: Instance types t2.small or t2.medium are reasonable choices. Under Configure Instance Details: No changes are needed. Under Add Storage: Change size to 10 to 50 GiB. Under Add Tags: Provide a name for your instance. Under Configure Security Group: If you know your local IP address or range, enter it in the source field for SSH. Furthermore, add rules for HTTP and HTTPS.

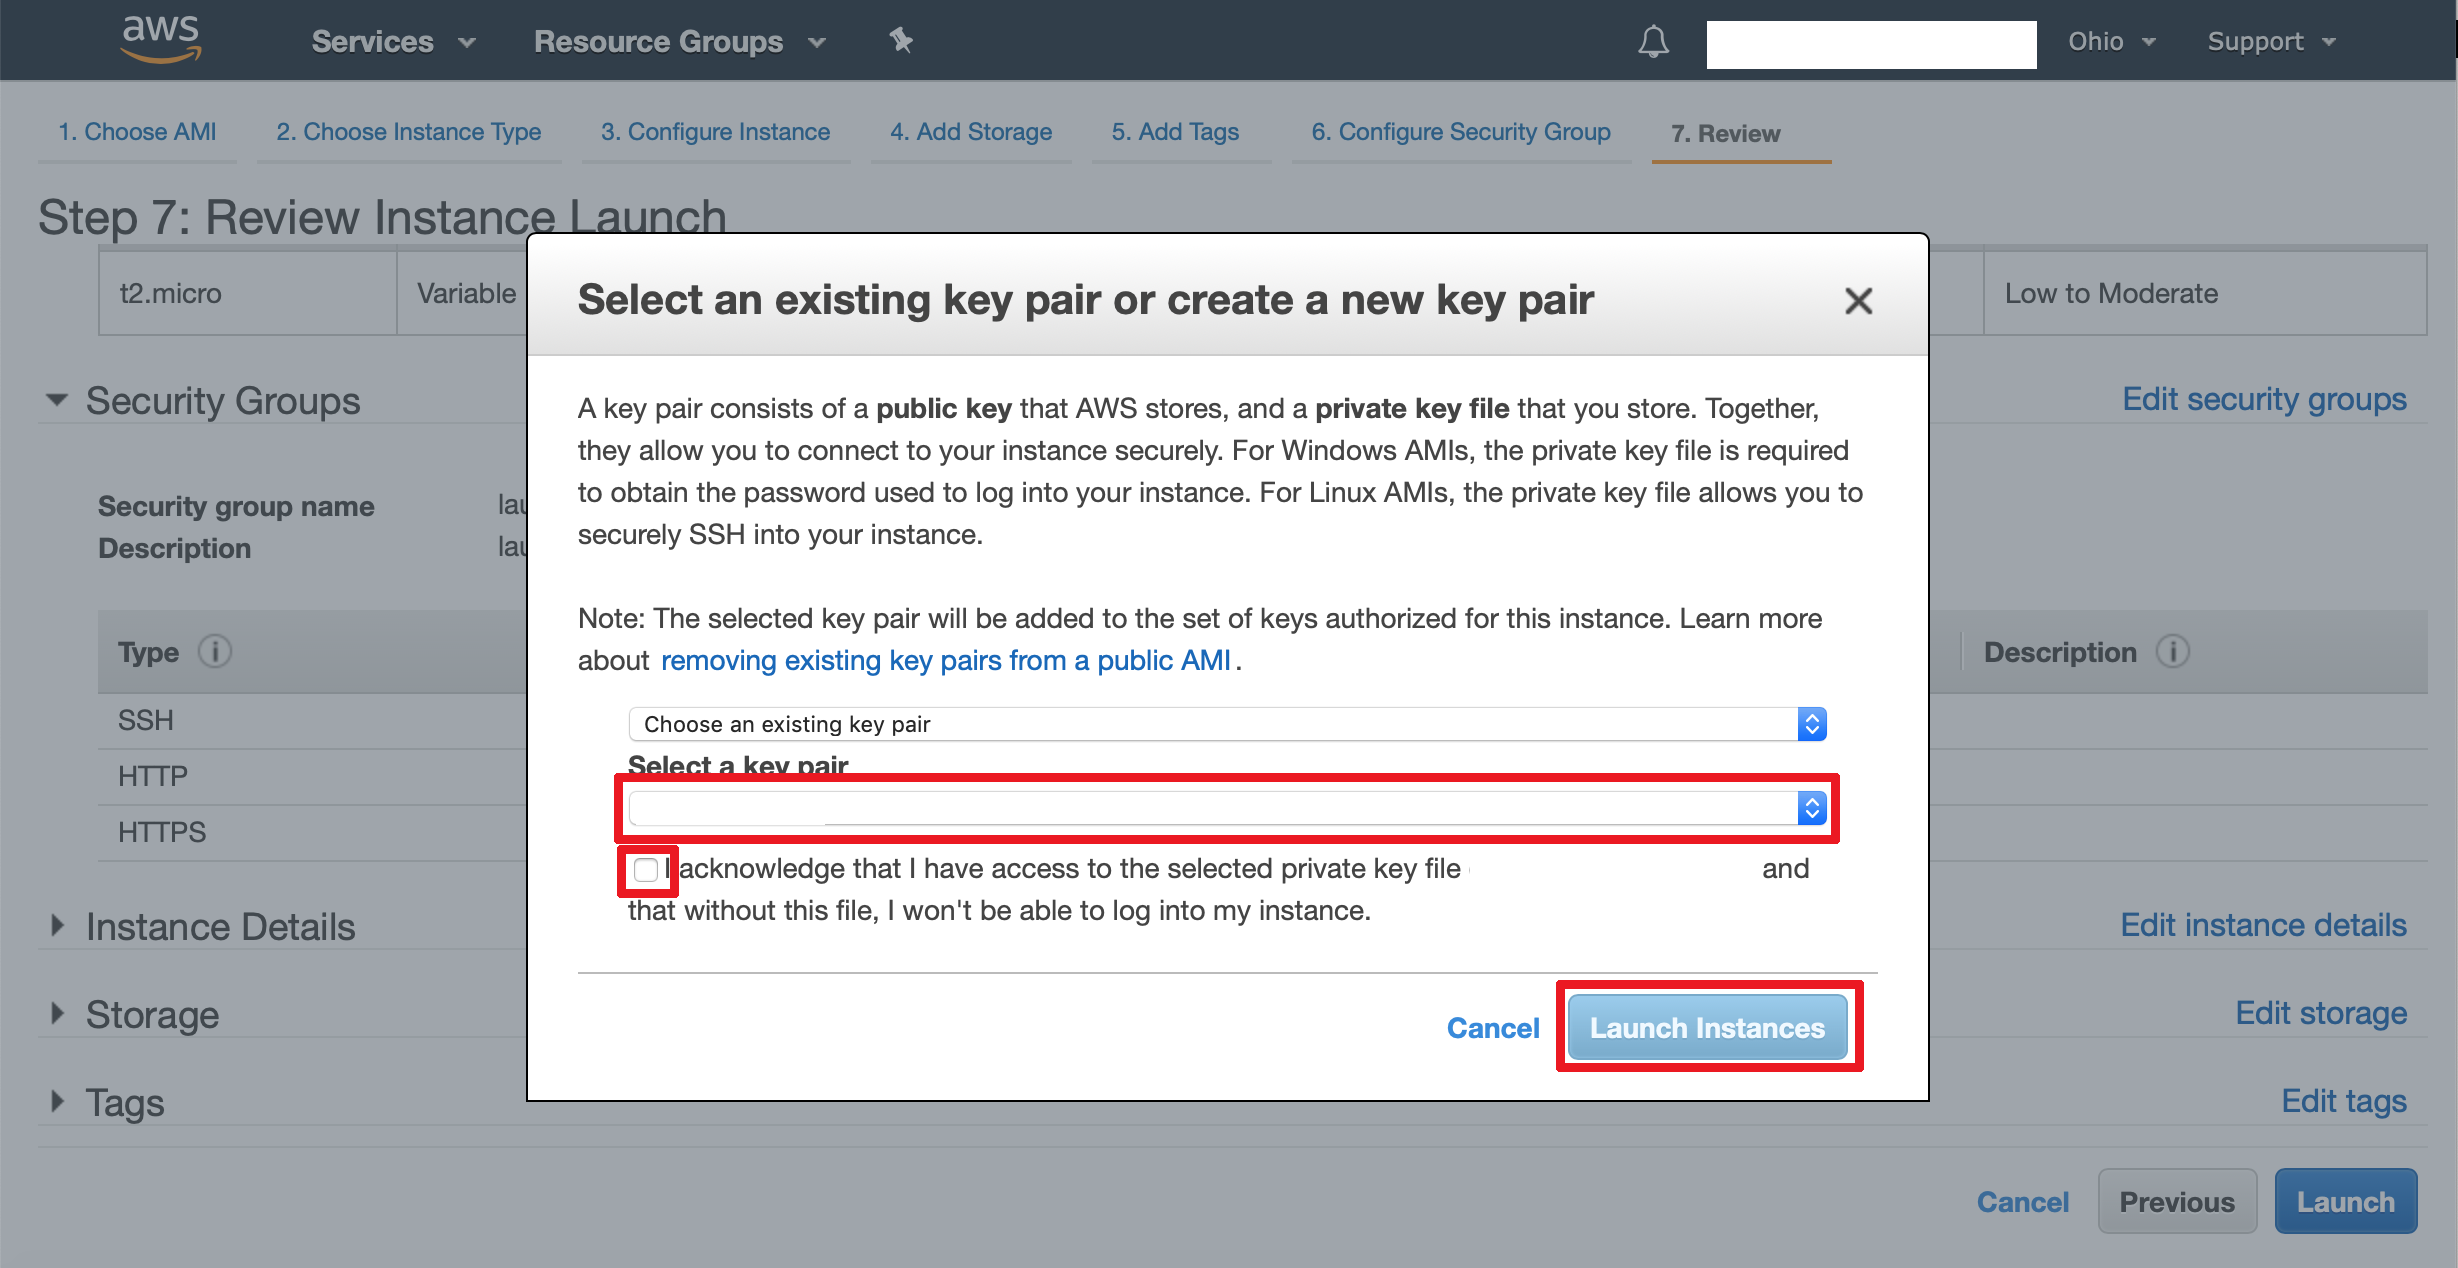
Review and Launch:
You will be prompted to choose the ssh key you wish to use. Use the one associated with your computer.
You will be taken to the instances page. Click on the instance you made. A window will open at the bottom of the screen
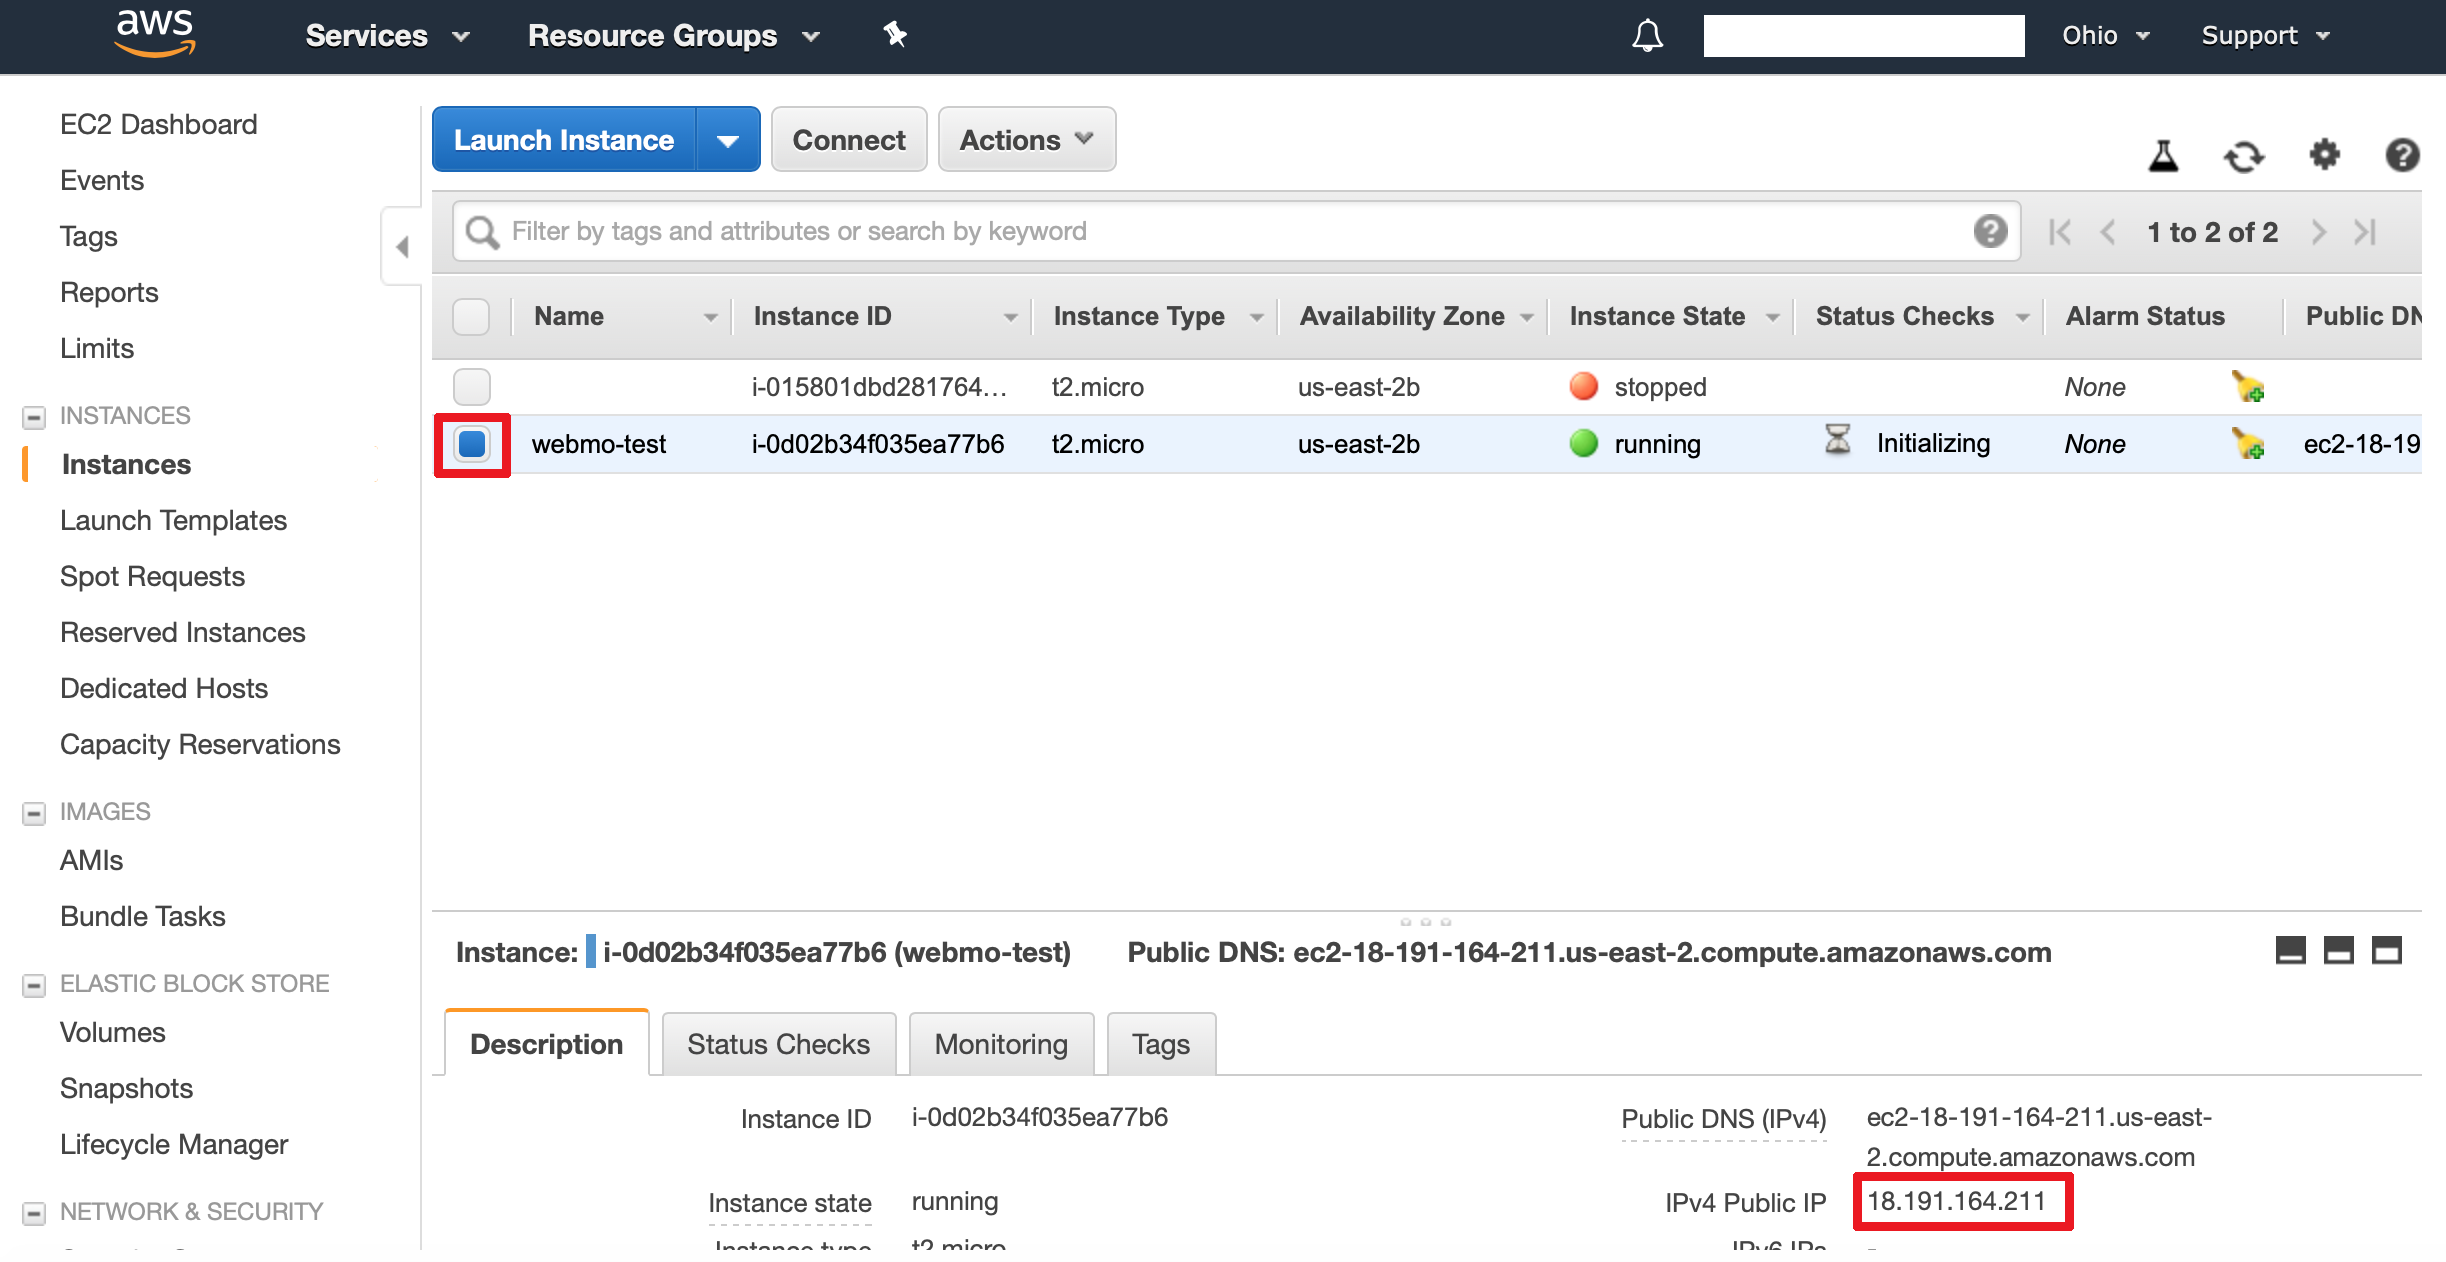
Note the IPv4 Public Address (#.#.#.#) of the instance displayed near the bottom of the screen.
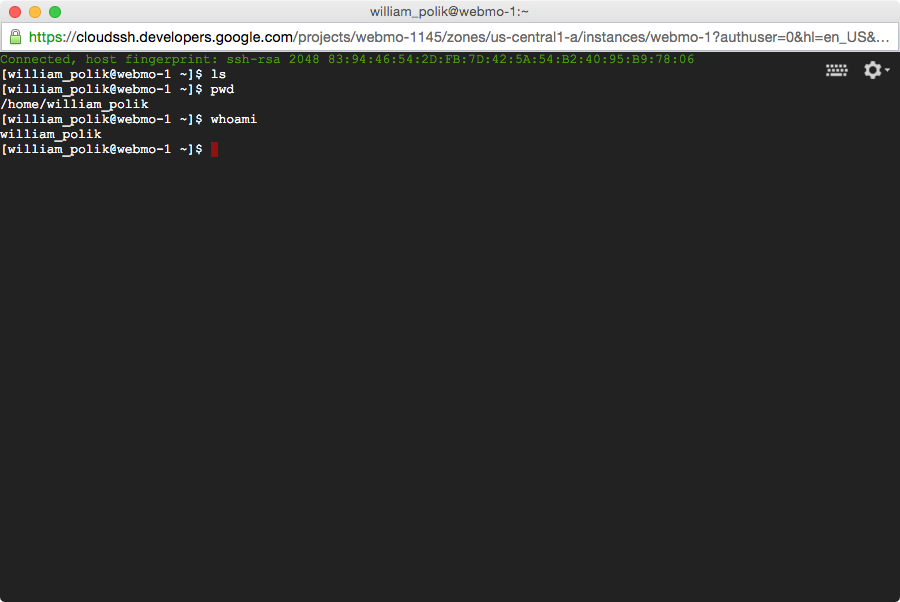
Verifiy SSH Access
On your local computer, open a terminal program and type the command
where #.#.#.# is the IPv4 address of the instance. You should connect to your virtual machine.
Test some unix commands on your virtual machine:
$ pwd
$ whoami
Activate your Q-Chem License on AWS
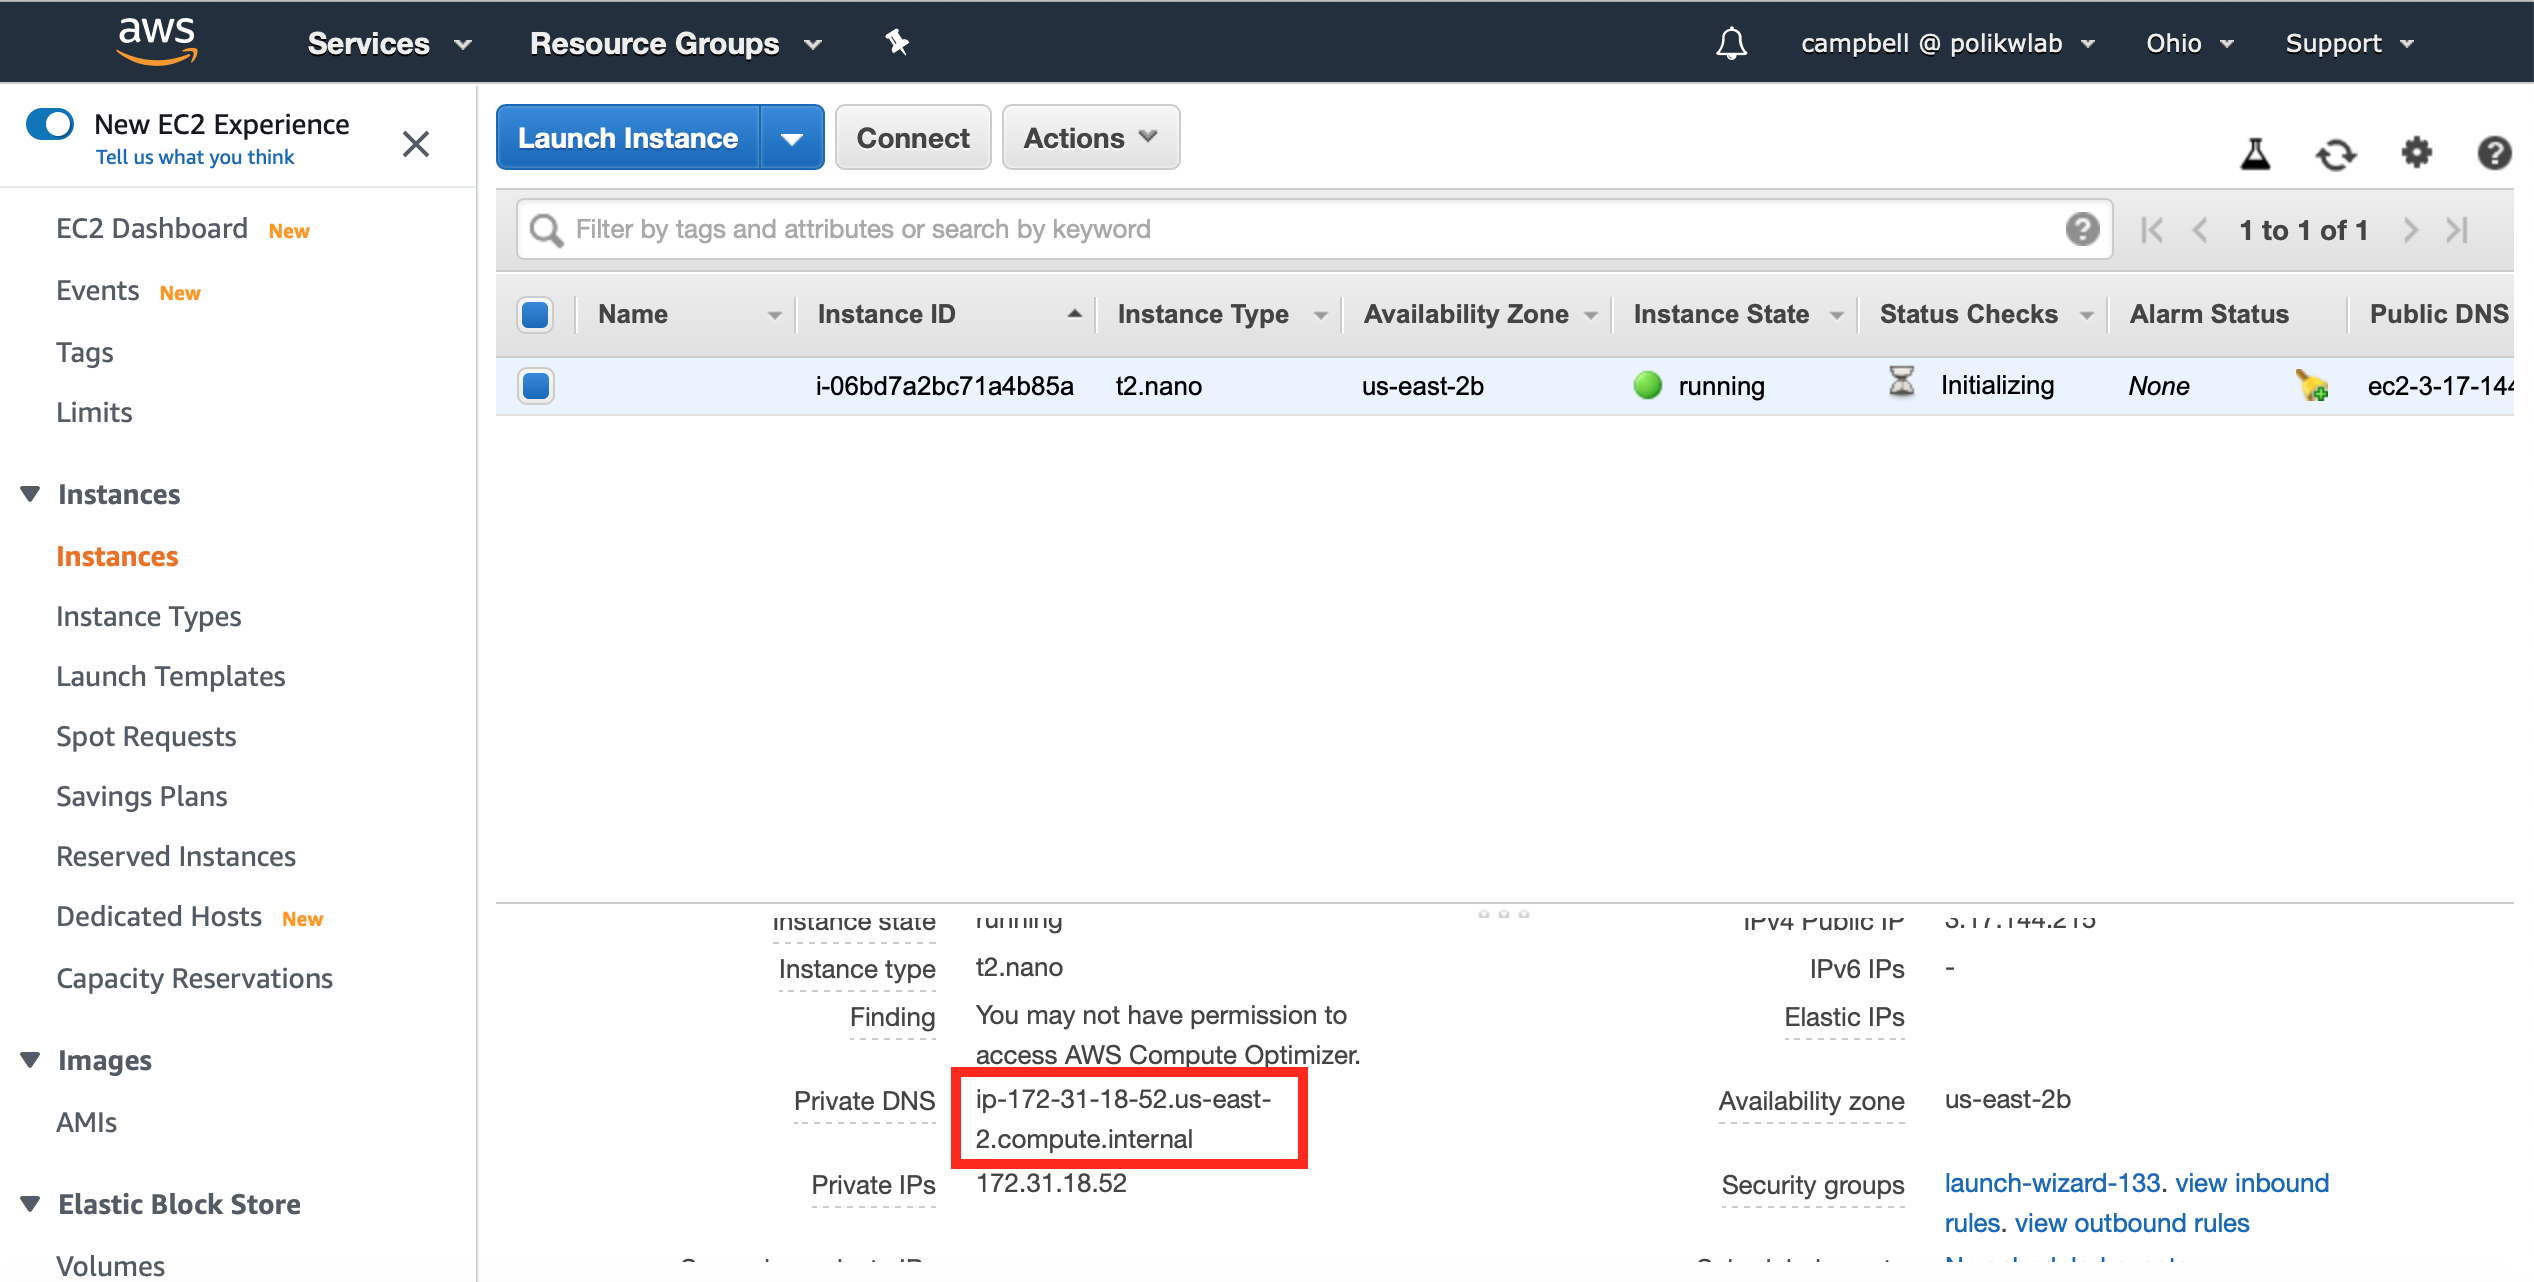
Navigate to your EC2 instance on the EC2 dashboard and under “Description” find the “Private DNS” of your instance. Email the Private DNS name of your instance along with your Q-Chem order number to license@q-chem.com using the email which you originally used to apply for the license. The Q-Chem licensing team will use this information to activate your instance.
Verify Q-Chem Works from Command Line
The Q-Chem AMI comes with a test job, test_qchem.in, in the ec2-user home directory. From the home directory, run the following commands.
cat test_qchem.out
Verify that the output from the second command is reasonable Q-Chem output.
Install WebMO using SITC
In your Q-Chem virtul machine shell, execute the following commands
tar xzf sitc.tar.gz
./sitc/install --skip-engines
Navigate to the address provided by SITC: http://#.#.#.#/webmo. Login as admin with a blank password, and provide a WebMO administrative password.
Enable Q-Chem in WebMO
- Get Q-Chem Path
- In your Q-Chem AMI shell type “which qchem” and press enter
- Take the output from that command and get a path similar to “/opt/qchem/qc522” where “522” is the version number
- Sign in as admin on your WebMO page and go to the Interface manager
- Change the qchem path to the one you just got
- Press “Submit”
- Sign into a webmo user account and run a test job